The Gritty Reality of a Dying Draw
You turn the tap and instead of the crisp, clear rush of groundwater, you get a hesitant gurgle followed by a stream of liquid sandpaper. That brownish, abrasive slurry isn’t just an inconvenience; it is the sound of your borehole gasping for air as it chokes on its own silt. I have seen it a thousand times: a high-yield well that used to push twenty gallons a minute reduced to a pathetic trickle because the geological balance has shifted. My old journeyman used to say, ‘Water is lazy, but it’s patient.’ It will find the tiniest pinhole in a casing or a gap in a filter pack and turn it into a highway for sediment given enough time. By the time you notice the grit in your teeth, the damage to your internal plumbing—from the sediment-clogged aerators to the calcified valves in your dishwasher—is already underway. In 2026, we don’t just ‘flush’ these problems; we perform a forensic extraction. This isn’t about dumping chemicals down a hole and hoping for the best; it is about understanding the hydraulic physics of the aquifer and using modern site services to reclaim your water supply.
“Boreholes shall be drilled and constructed in a manner that prevents the entry of surface water and pollutants, ensuring the structural integrity of the filter pack.” – ASTM D5092 Standards
The Anatomy of an Underground Obstruction
When a borehole silts up, it’s usually a failure of the filter pack—the layer of graded sand or gravel placed between the well screen and the borehole wall. Over years of pumping, the constant ‘on-off’ cycle creates a pulsing hydraulic shock. This movement slowly migrates the ‘fines’—those microscopic particles of clay and silt—through the gravel pack. They eventually hit the well screen and bridge over the openings like a dam. This is where the chemistry of your water turns against you. If your water is even slightly acidic, it begins a slow process of pitting the screen, creating larger apertures that allow even more debris to enter the column. I’ve pulled pumps out of the ground where the intake screen was so packed with black, anaerobic sludge that you couldn’t see the metal through the filth. This sludge smells like a mixture of rotten eggs and stagnant swamp water, a byproduct of iron-reducing bacteria that thrive in the low-oxygen environment of a silted well. Using borehole strategies focused on long-term reliability is the only way to prevent this cycle of decay. If you ignore it, the silt acts as a grinding paste, eating through the stainless steel impellers of your submersible pump until the motor burns out from the sheer friction of pushing mud.
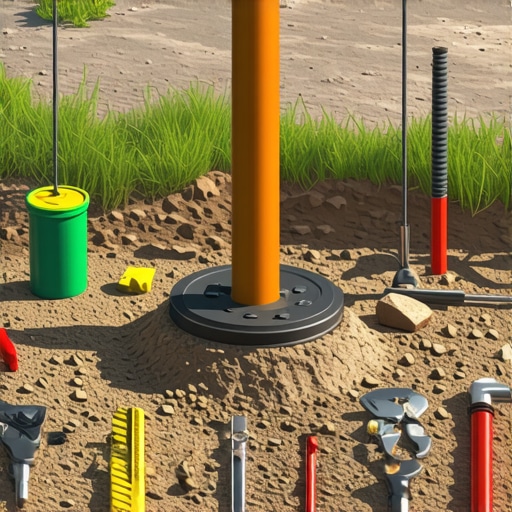
Step 1: Forensic Diagnosis and Vacuum Excavation
Before you drop a single tool down that hole, you need to know what you’re fighting. The first step in 2026 is utilizing vacuum excavation to expose the wellhead and the pitless adapter safely. In the old days, we’d just dig with a backhoe and hope we didn’t snag the electrical line or the main water lead. Now, we use high-pressure air or water to liquefy the soil around the rough-in, sucking it away with a vacuum truck to reveal the stub-out without a single scratch on the casing. This process, often called daylighting, allows us to inspect the structural integrity of the well cap and the seal. If the seal has failed, surface water is likely washing silt directly into the top of your well. We then drop a high-definition down-hole camera. You can see the ‘curtains’ of silt hanging off the screen and the pile of debris at the bottom of the sump. It’s not just dirt; it’s a graveyard of mineral scales and biological film. Understanding the subsurface through accurate subsurface assessments is critical because if the casing is cracked, no amount of cleaning will fix it—you’ll be chasing a ghost.
“Potable water supply systems shall be protected against contamination through the proper sealing of well casings and the maintenance of backflow prevention.” – IPC Section 608.1
Step 2: The High-Pressure Extraction Phase
Once we’ve identified that the casing is sound, we move to the heavy lifting: the removal of the accumulated silt. This isn’t a job for a standard shop vac. We employ specialized site services that utilize large-scale vacuum excavation units capable of pulling heavy sludge from hundreds of feet down. We lower a suction pipe to the bottom of the borehole. As we agitate the water at the bottom—sometimes using compressed air to create a ‘boil’—the vacuum sucks the suspended solids out. You’ll see the discharge line turn from a thick, chocolatey brown to a murky grey, and finally to clear. But don’t be fooled; the silt inside the column is only half the battle. We also have to address the silt trapped in the gravel pack outside the screen. We use a technique called ‘surging,’ where a plunger-like tool is moved up and down the well to force water back and forth through the screen. This breaks the ‘bridge’ of silt, pulling the fines into the well where they can be vacuumed out. If you don’t do this, the well will just silt up again within a month. Proper site services for complex excavation ensure that this surging doesn’t collapse the formation entirely.
Step 3: Daylighting and Redevelopment
The final step is the ‘redevelopment’ of the well, which is essentially a deep-clean for the aquifer’s entry point. This often involves daylighting the discharge until the water is completely free of turbidity. We check the cleanout and ensure all fittings are sealed with high-grade pipe dope—not that cheap, runny stuff, but a thick, PTFE-based sealant that can withstand the vibration of the pump. We also look at the electrical stack. Silt buildup often causes the pump to work harder, which generates heat and can melt the insulation on the wires. If we see any signs of thermal stress, we replace the lead wires and the Fernco couplings to ensure a watertight seal. This is where innovations in daylighting really shine, allowing us to see the exact moment the water quality shifts from ‘construction grade’ to ‘potable grade.’ We also recommend installing a cleanout at the wellhead for future maintenance. Remember, a borehole is a living thing; it breathes and shifts with the earth. If you treat it like a ‘set it and forget it’ appliance, it will fail you when you need it most. By using installation tips for daylighting integration, you create a system that can be easily serviced without tearing up your entire yard every five years. Water always wins, but with the right tech, we can keep it flowing where it belongs: into your pipes, not into your pumps’ bearings. Contact us if you are ready to fix your flow for good.
This post really highlights the importance of proactive maintenance and proper filtration in preventing borehole silting. I’ve seen firsthand how neglecting these steps can lead to costly pump failures and low water yields. The use of vacuum excavation for daylighting is a game-changer—safe, minimally invasive, and gives a clear picture of what’s happening underground. I wonder, for homeowners with older wells, how often should they consider a thorough inspection like this? In my experience, every 5 to 10 years is a good window, but it really depends on local soil conditions and water chemistry. Has anyone found that regular monitoring of turbidity levels or water flow rates helps predict when silt buildup might become a major issue? Sharing some practical tips could help many avoid complete well breakdowns and extend the lifespan of their systems.